- Track your orders
- Save your details for express checkout
Tirimoana honey blog
Saving the world, one beeswax wrap at a time
With the kids heading back to school, it’s time to think about the lunch boxes again *collective sigh*…….... Sorry I haven’t got any great lunchbox ideas that will have your kids jumping for joy when they pop the lids off their lunch box, but I have got a fool proof recipe to make beeswax wraps that will make our planet jump for joy!
The average family can go through 24 rolls of plastic wrap per year. Two boxes of plastic wrap, ranging from three to five dollars each, per month adds up to around nearly $90 per year. To spend that on a item that essentially gets thrown away is madness! So instead of throwing away money, we can all do out bit for our planet and save our hard earned cash at the same time!
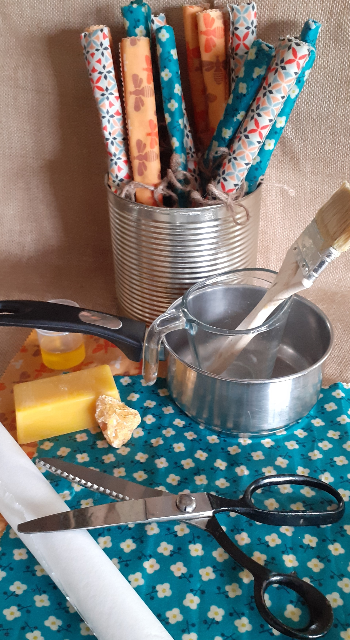
I’m lucky enough to have a broken slower cooker (not a sentence I thought would ever come to mind, but there you go) It still heats and maintains it heat, it just has a broken switch, so when I'm making 30 or more to sell at our markets the slow cooker comes in handy. But when you’re just making a small amount, the below recipe can be made in a double boiler and will make around 8-10, 30cm x 30cm wraps. Perfect for wrapping honey sandwiches or covering small bowls, You don’t want the fabric to Stretch, so the best fabric to use is 100% cotton. I also cut the cotton out with pinking shares, this helps slow the fabric from fraying over time, but its up to you, its not the end of the world if you don't do it,
So you will need……….
Beeswax 100g
Jojoba Oil 3Tb
Pine Rosin 20g
8 – 10 Pre cut piece of cotton
Bare in mind that Beeswax is hard to wash off, so use things that you don’t mind setting aside for wrap making, because after doing this once you will defiantly be doing it again! Also something else to note, beeswax is highly flammable so never leave it unattended while on the element. You will also need the following equipment............
- Heat proof jug (or something similar)
- Paintbrush
- Baking paper & Oven (pre heated to 100 degrees C)
- Oven Tray
- Firstly crush up the pine rosin into crumbs. You can use this by using a mortar a pestle or putting the rosin in a bag a crushing it with the mortar works great too.
- Melt the Beeswax, rosin and Jojoba oil in the double boiler (see notes at the bottom if you’re unsure what a double boiler is).
- Set your baking paper on the oven tray, making it bigger than your piece of fabric. Place your fabric square on top.
- Grab you paintbrush and as quickly as possible paint the fabric with your melted ingredients. Make sure you stir your melted ingredients in-between each application.
- Once you have an even coverage place it in your pre heated oven for 5 mins. This will make it easier to get an even coverage. Brush again with your paint brush then hang up for a few minutes to dry!
Taking care of your wrap is pretty simple, a quick rinse under a warm tap (not hot) or a wipe down with a damp cloth is all it takes. They can last up to 6months if taken care of properly. Over time they will become less sticky but they can be easily revived by returning them to the oven and even grating a little bit more Beeswax on to melt.
Have a look on our website for our refined wax. We sell it in convenient 100gm blocks
https://www.tirimoanahoney.co.nz/wax/x_cat/00333.html
Double Boiler
Half fill a pot with water, bring to the boil and then reduce to a gentle simmer.
Place your beeswax, Jojoba and rosin in your oven proof jug, making sure that it is small enough to fit in your pot. Slowly place the jug in the pot


1 Comments
JM